Programming #
The NORVI IIOT-AE03 has a mini USB Port for serial connection with the SoC for programming. Any ESP32-supported programming IDE can be used to program the controller. Follow this Guide to programming NORVI ESP32-based controllers with Arduino IDE.
SoC: ESP32-WROOM32
Programming Port: USB UART
Digital Inputs #
Wiring Digital Inputs #
The digital inputs of the NORVI-IIOT-AE03 can be configured as both Sink and Source connections. The inverse of the Digital Input polarity should be supplied to the common terminal.

Programming Digital Inputs #
Reading the relevant GPIO of the ESP32 gives the value of the Digital Input. When the inputs are in the OFF state, the GPIO goes HIGH, and when the input is in the ON state, the GPIO goes LOW.
Refer to the GPIO allocation table in the Datasheet for the digital input GPIO
void setup() {
  Serial.begin(9600);
  pinMode(18, INPUT);
  pinMode(39, INPUT);
  pinMode(34, INPUT);
  pinMode(35, INPUT);
  pinMode(19, INPUT);
  pinMode(21, INPUT);
  pinMode(22, INPUT);
  pinMode(23, INPUT);
}

void loop()  {
  Serial.print("D1: ");                        //Digital Inputs Check
  Serial.print(digitalRead(18));
  Serial.print("\tD2: ");
  Serial.print(digitalRead(39));
  Serial.print("\tD3: ");
  Serial.print(digitalRead(34));
  Serial.print("\tD4: ");
  Serial.print(digitalRead(35));
  Serial.print("\tD5: ");
  Serial.print(digitalRead(19));
  Serial.print("\tD6: ");
  Serial.print(digitalRead(21));
  Serial.print("\tD7: ");
  Serial.print(digitalRead(22));
  Serial.print("\tD8: ");
  Serial.print(digitalRead(23));
  Serial.print("\n");
  delay(1000);
}
0 – 10V Analog Input #
Wiring Analog Inputs #

Reading Analog Input #
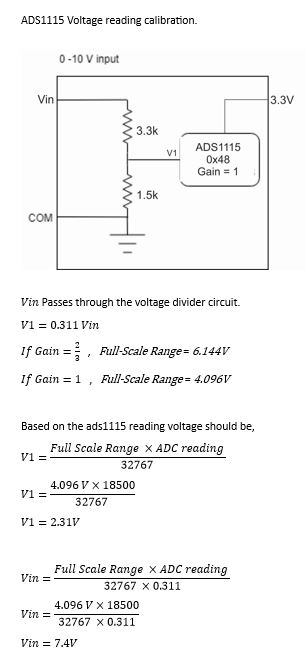
Reading the relevant I2C address of the ADC gives the value of the Analog Input.
𝑉𝑖𝑛 Passes through the voltage divider circuit.

Programming Analog Inputs #
#define Analog 33
int buttonState = 0;

void setup() {
   Serial.begin(9600);
}
void loop()  {
   Serial.print(analogRead(Analog));
   Serial.print("\n");
   delay(1000);
}
Built-in Buttons #
| Read mode | ADC (Analog to Digital Conversion) |
| Analog IO | GPIO32 |

Programming Buttons #
#define buttonPin 32
int  buttonState = 0;

void setup() {
  Serial.begin(9600);
  pinMode(buttonPin,INPUT);
}
void loop() {
  Serial.print("Button: ");
  buttonState = analogRead(buttonPin);
  delay(50);
  Serial.print(analogRead(buttonPin));
  Serial.print("\tAnalog: ");
  delay(1000);
}
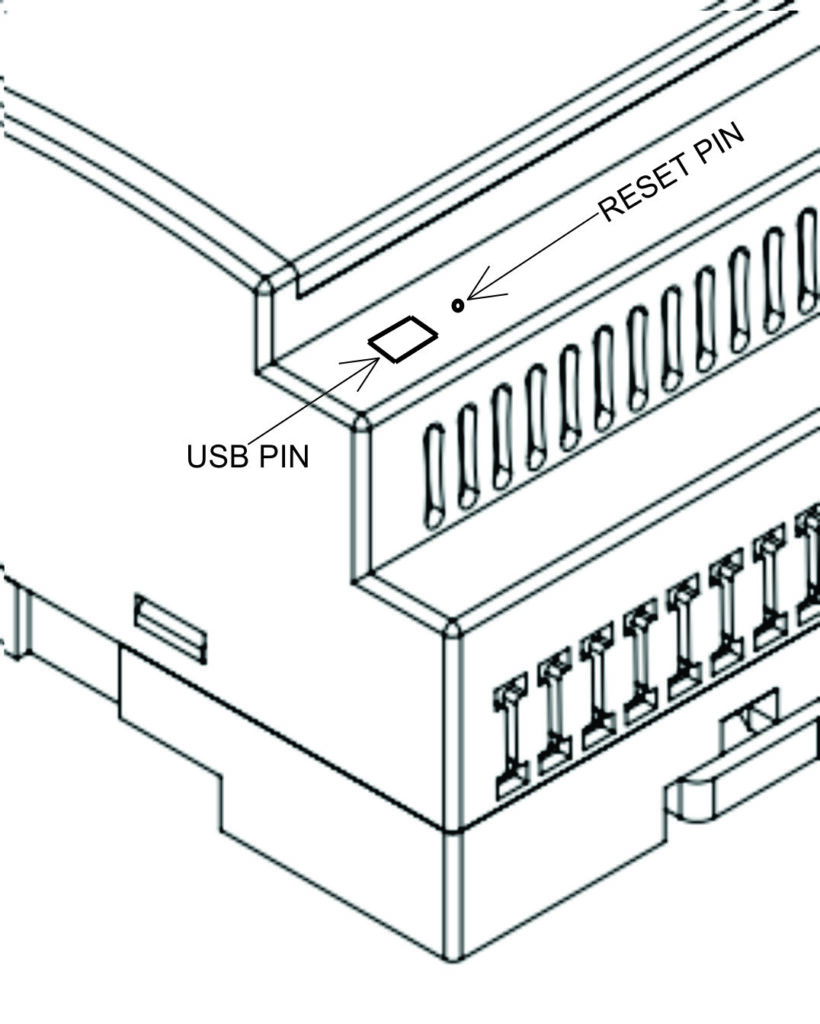
RESET and USB #


