Setting up environment #
- Installing Arduino IDE
- Adding ESP32-S3 to Arduino with Board Manager
1. Installing Arduino IDE #
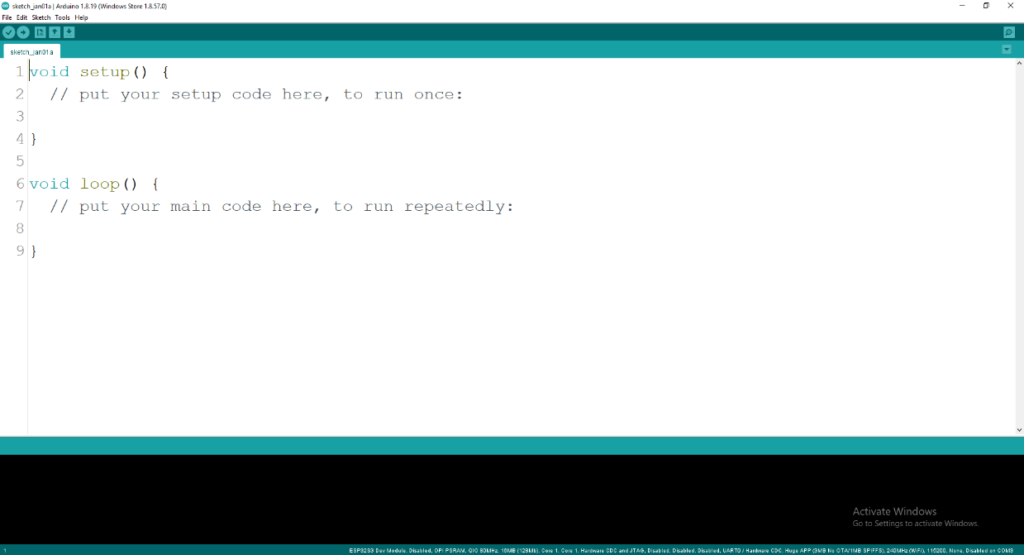
Visit the official Arduino website to download the Arduino IDE development tool. Download the appropriate library files, install the IDE, and then click the Start icon to launch it. Open the IDE as shown in Figure 1 below.
2. Adding ESP32-S3 to Arduino #
There are two methods to add ESP32-S3 board to arduino.
2.1. Add through board manager. #
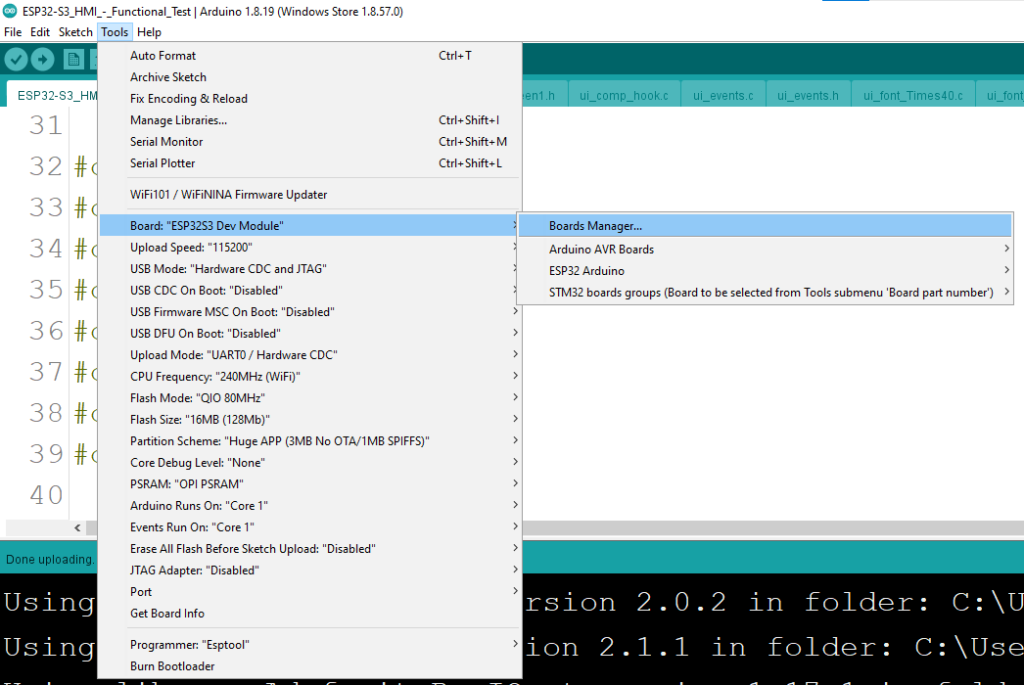
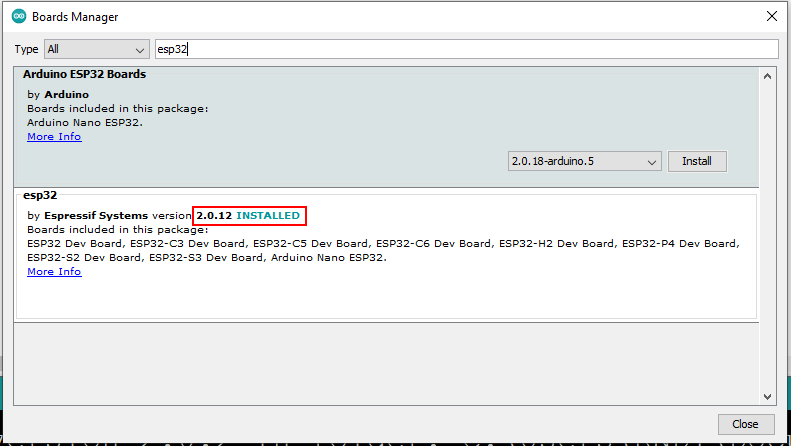
Click on “Tools” in the top navigation bar, then hover over “Board” and select “Boards Manager”. In the Boards Manager, search for the keyword “ESP32”. From the results, install ESP32 by Espressif Systems, version 2.0.12.
2.2. Add manually through additional board manager urls. #
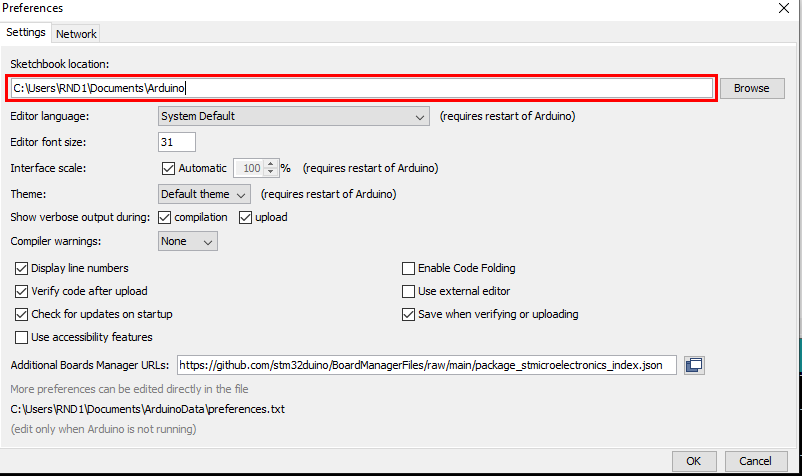
Click on the File menu in the top menu bar, then select Preferences. This will open the Preferences dialog box. Locate the textbox labeled “Additional Boards Manager URLs”.
If there is already text in this box, add a comma at the end, then paste the following link into the textbox. Finally, click OK to save the settings.
https://raw.githubusercontent.com/espressif/arduino-esp32/gh-pages/package_esp32_index.json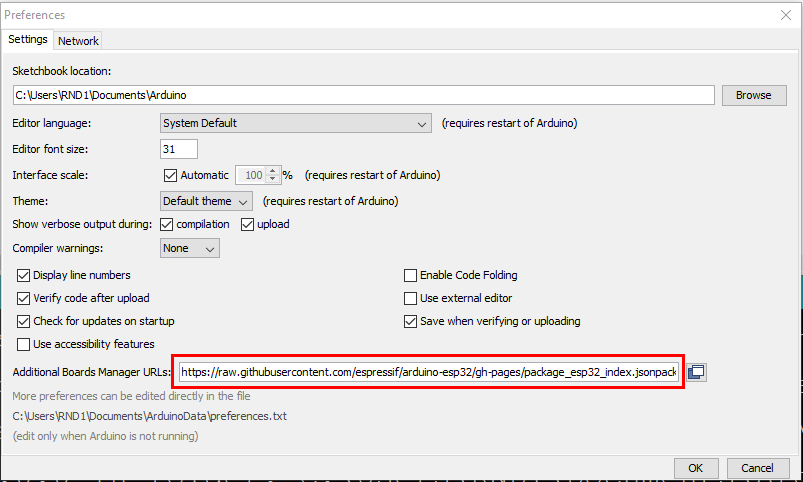
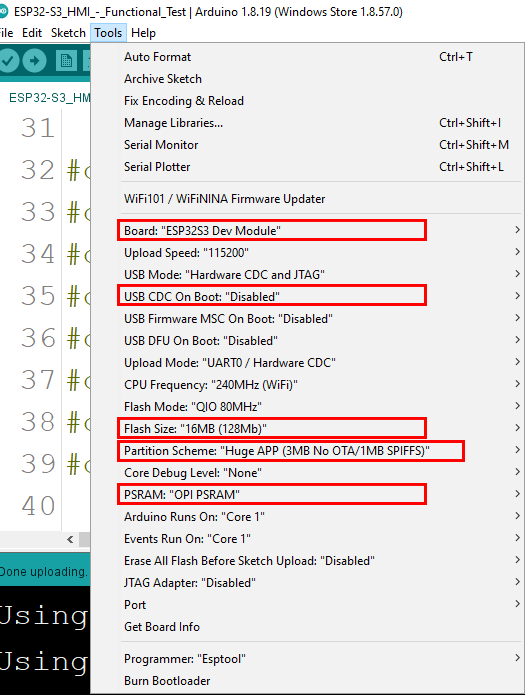
Once the installation is completed, select the correct board options for the “ESP32 Arduino” board. In the tools tab, on the board, choose “ESP32S3 Dev. Module”.
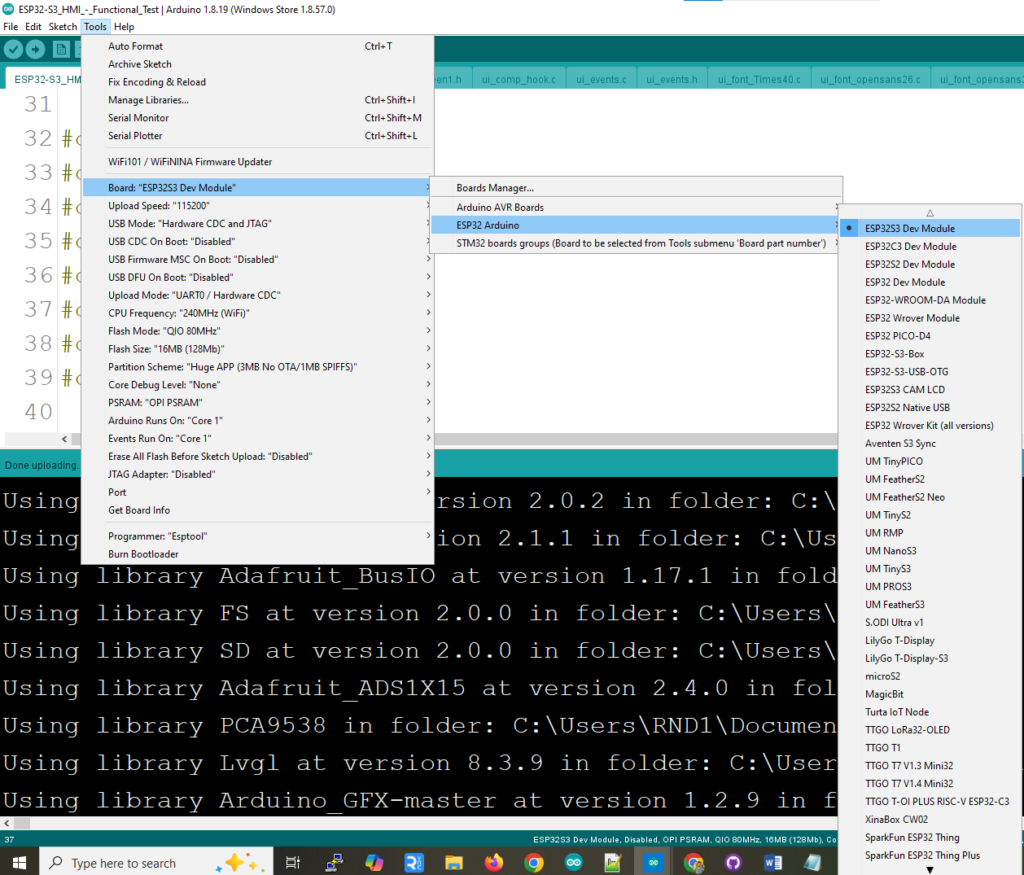
Choose the chip and settings according to the chip as shown below,
3. Adding necessary libraries #
3.1. Adding Arduino Graphics Library (Arduino_GFX_Library) #
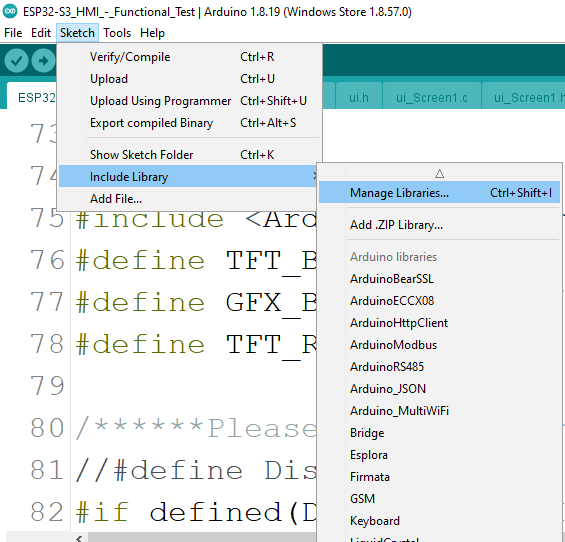
Click on “Sketch” in the top navigation bar, then hover over “Include Library” and select “Manage Libraries”. In the Library Manager, search for the keyword “GFX”. From the results, install the GFX library for Arduino by Moon on Our Nation, version 1.2.9. Please ensure that you install this exact version.

3.2. Adding Adafruit_ADS1X15 Library #
Open Library Manager in Arduino, then search for the keyword “ADAFRUIT”. From the results, install the Adafruit_ADS1X15 library by Adafruit, version 2.4.0.
3.3. Adding PCA9538 Library #
Download the PCA9538 library zip file from the following link.
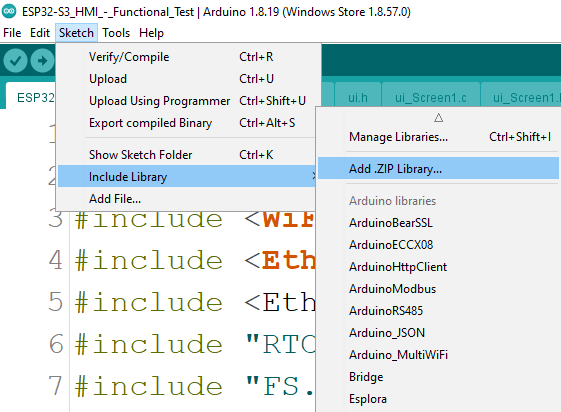
Next, click on “Sketch” in the top navigation bar. Hover over “Include Library”, then select “Add .ZIP Library”. Finally, browse to the downloaded ZIP file and include it in your Arduino environment.
3.4. Adding lvgl Library #
Download the Lvgl library zip file from the following link.
Then include the zip file into libraries as above steps. Then download the file lv_conf.h from
following link.
Next, place this file in the location where Arduino library files are installed. Inside the Sketchbook folder, there is a folder named libraries, this is where the file should be added. The downloaded lv_conf.h file must be included in this folder.
3.5. Adding GT911 Library #
Download the Lvgl library zip file from the following link. Then include the zip file into libraries as above steps
3.6. Other Libraries #
In addition to the specific libraries mentioned for this application, some common libraries are also required in the Arduino environment. If these libraries are not already installed, please add them via the Library Manager or by including the ZIP files.
📚 Ex: Wire.h, SPI.h , WiFi.h , Ethernet.h, EthernetUdp.h , RTClib.h, FS.h, SD.h
Program Setup #
Now downloaded the example program from the following link.
After that compile and upload the program and will get a HMI interface like in below figure.
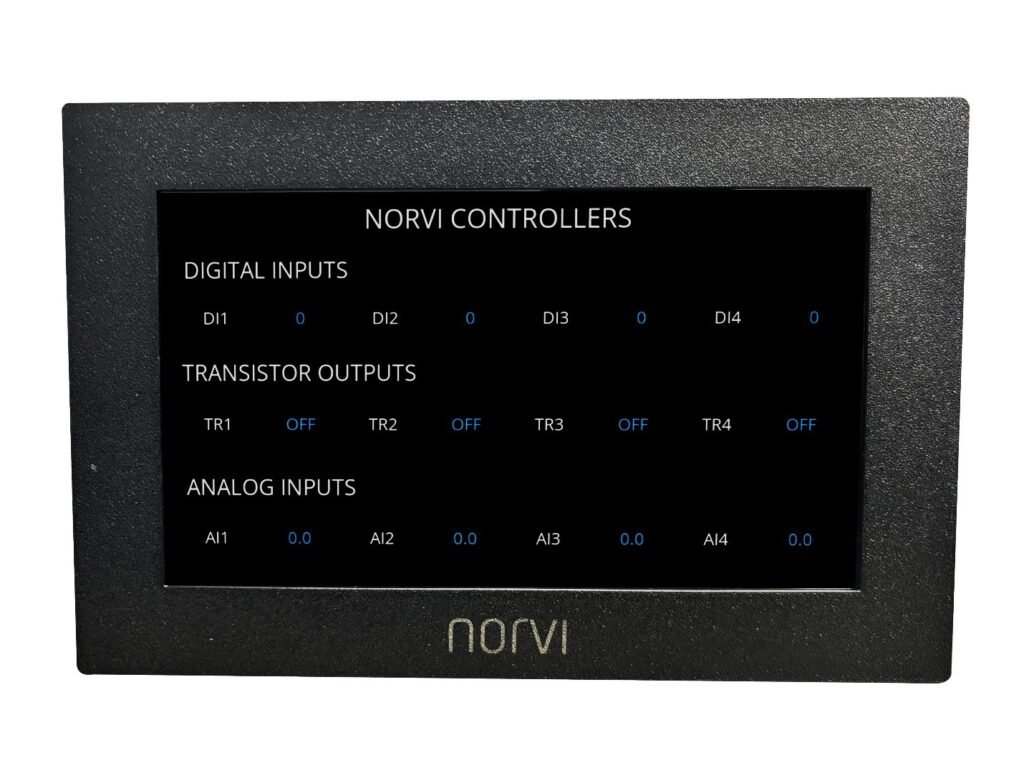
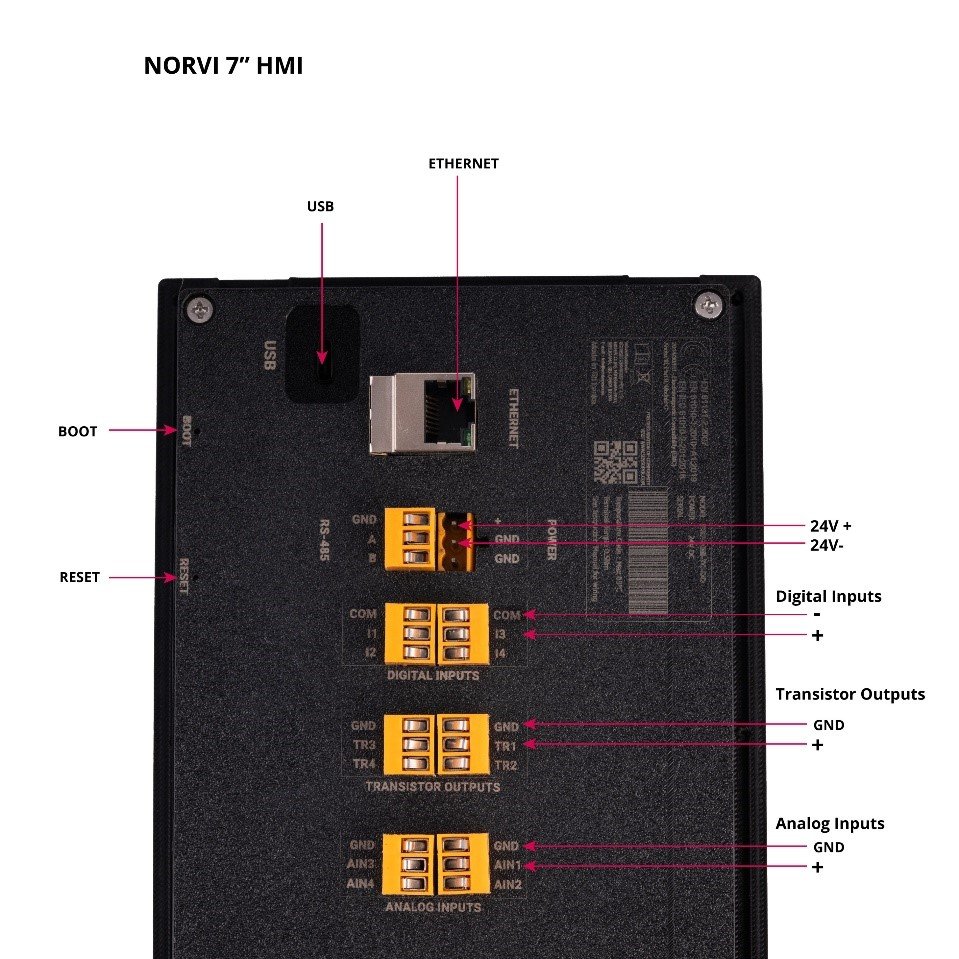
After successfully uploading the code to the ESP-HMI-7C, you can verify the HMI interface by connecting the digital inputs, analog inputs, and transistor outputs as shown in the figure below. This will allow you to confirm that all inputs and outputs are functioning correctly.